On install day, two trucks should pull up to the site within thirty minutes of each other. Both trucks should belong to the same shop. If they don't, you're not getting a professional install — you're getting a delivery, with a separate crew showing up later to figure out what to do with the panels.
A real install has a sequence. Knowing the sequence is the difference between a relaxed install day and a defensive one.
48 hours out — what should already be done
Two days before install day, the GC should confirm five conditions in writing:
- Finished floor is at final elevation. Stainless bar tops are set off the floor; an extra layer of tile installed the day before throws every dimension off.
- Walls in contact with the bar are plumb, sealed, and painted. A bar that gets installed against an unfinished wall has to be reset after the wall is finished. Resetting a 14-gauge stainless top is not a free operation.
- Sub-bar structural framing is built and inspected. The substrate is what holds the load. If it's not signed off, install pauses.
- Utilities are roughed in and capped. Water, drain, electric, gas — all stubbed and capped at correct heights.
- Access to the install zone is clear. No other trades in the room during install. Two crew members carrying a 14-foot panel cannot share a space with a flooring crew on hands and knees.
A good fabricator sends a confirmation checklist to the GC 72 hours before install. If the checklist comes back with any "in progress" answers, the install date moves.
Arrival — who shows up, in what truck, with what tools
Truck 1 is the parts truck. It carries the crated bar top, the sub-frame components, fasteners, sealants, and finish materials. Truck 2 is the tool truck. It carries the welding rig with argon back-purge supply, the two orbital sanders, the polish materials, the templating tools (in case a field measurement is needed), and the rolling work cart.
The crew is typically 2–4 people depending on bar size. The lead installer has been on the project since templating. At least one crew member is a certified welder. On a larger install, a finisher who runs the M5 recipe in the shop is on site.
Everyone is in branded shirts because everyone is on the same payroll. If anyone shows up in a different uniform, ask who they're with.
The install window — typically 4–8 hours for a single bar
The work runs in a fixed sequence. Each step has a "done" condition before the next step starts.
Step 1 — set the substrate (45–90 minutes). Sub-frame, leveling shims, anchor bolts. The substrate has to be flat, plumb, and rigid before the stainless touches it. A good installer is fussy about this step because nothing downstream forgives a sloppy substrate.
Step 2 — dry-fit the top (30–60 minutes). The fabricated panel is set in place without sealant. The crew checks for tolerances against the walls, the substrate, the floor, and any penetrations. If anything is out, it gets adjusted before the panel commits to its final position.
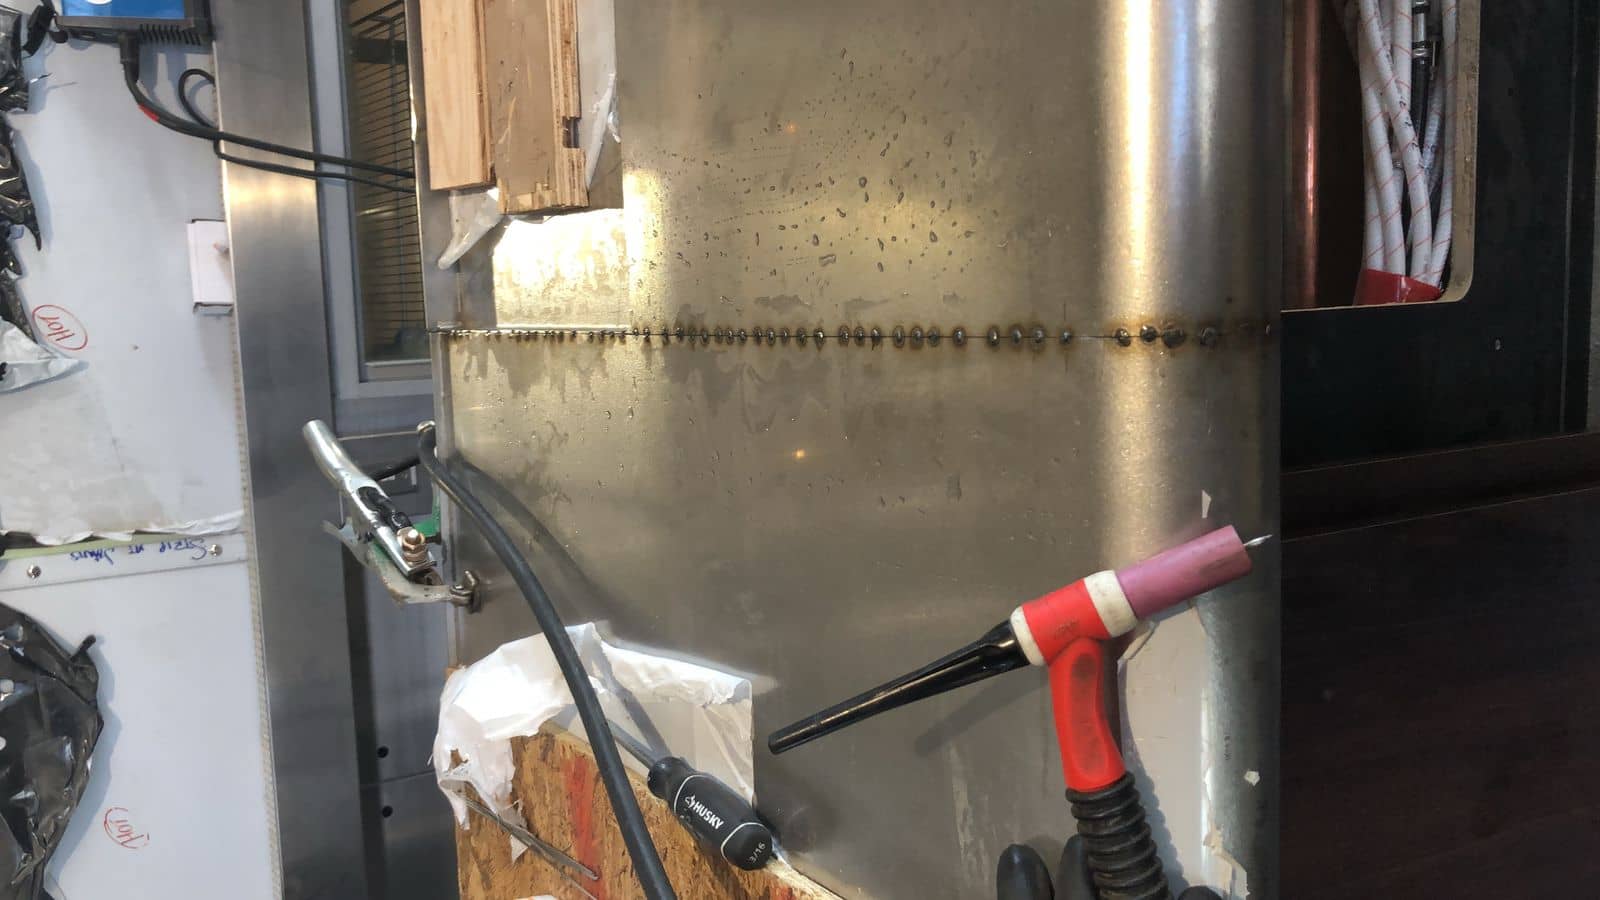
Step 3 — weld or seal seams in place (60–180 minutes). Joins between panels are welded with the same TIG and back-purge procedure that ran in the shop, or sealed with food-safe NSF/ANSI 2-compatible sealant per the spec. If a field weld is required, it follows the same AWS D18.1 sanitary stainless practice as the shop welds.
Step 4 — final polish and raking-light QC (30–90 minutes). Any minor handling marks from freight or install get touched up. The crew runs a raking-light inspection at 30°, 3500K — the lighting standard the shop QC uses — to verify the finish is consistent across all panels under restaurant-relevant lighting.
When the install lead signs off on the raking-light pass, the install is done.
The walk-through — what the lead should hand off
Before the crew leaves, the lead installer walks the operator (or the operator's designee) through the finished install. The walk should include:
- A visual inspection under the room's actual lighting plan
- A finger-test of every accessible seam
- A function check on any drainage, electrical, or cooling penetrations
- A photo set documenting the as-installed condition
- A cleaning and maintenance protocol — printed and left in a binder on site
- The lead installer's direct phone number for the 30-day follow-up
A real walk-through is unhurried. If the installer is glancing at the truck, you've lost the moment. Stop the walk-through and call the question.
Post-install — the 7-day check-in and the warranty
Within seven days, the lead installer (or the shop's project manager) should call the operator for a check-in. The call covers any settling, any cleaning questions, any micro-marks that have surfaced under service lighting.
Within 30 days, the shop should send a follow-up confirming the install passed its first-month service period. If anything has surfaced, it gets addressed under warranty without an invoice. A first-month issue is almost always either an install nuance or an early-service contamination — both are on the fabricator to resolve.
The warranty document itself should cover three things: the steel (lifetime against material defect, including chemistry per the ASTM A240 mill report), the fabrication (5–10 years against weld and finish failure), and the install (1–2 years against install-related failure). If the install warranty is conspicuously absent or short, the install crew was a sub.
What a good install crew leaves you with
Five things, none of them optional:
- The finished install, photographed under restaurant lighting
- The mill test report for the steel
- The shop QC documentation, including the passivation record and the finish recipe reference
- A printed cleaning and maintenance protocol
- A direct phone number for the lead installer
These five items are the difference between owning a stainless bar top and owning the story of a stainless bar top. The first one lasts a generation. The second one fades when the original install lead moves on.
Bottom line — install day is the day the bid was honest, or it wasn't
You can audit a stainless fabricator on the bid sheet, on the shop visit, and on the references. The audit you can't do until install day is whether the crew, the trucks, the welder, and the finisher all show up — and whether the install lead is the same person who templated the job.
Most stainless installs we see go cleanly. The ones that don't go cleanly almost always have a common cause: the install crew was new to the project on install morning.
Ask the questions before you sign. The install will tell you whether the answers were real.
Our lead installer carries a small spirit level on his belt — not a digital one, just an old yellow bubble-and-vial level his father used. He says digital levels lie. The bubble doesn't care what you want it to say. He's right.
Everything on this blog comes off our shop floor and our job sites — 33 years of commercial stainless for In-N-Out, Yard House, SoFi Stadium, and 2,000+ builds across 35 states. If you're planning a project, we'll give you a straight answer on what it takes.